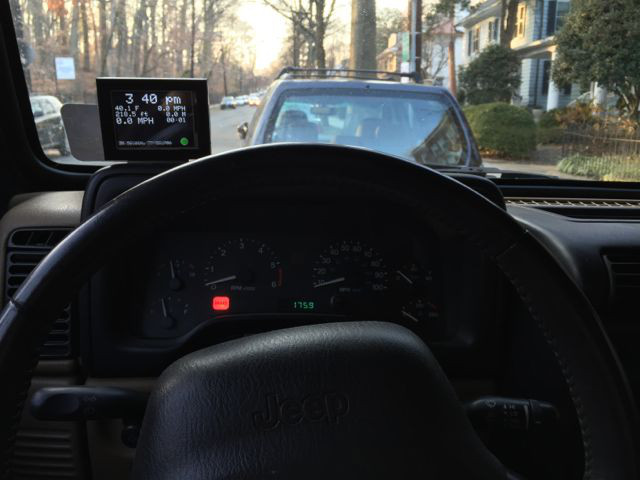
I finally got around to finishing my Jeep computer project. I had gotten the Arduino and display working, and I had wired everything together. However, as of my previous post about the project, neither the display nor the Arduino were in enclosures, and the cabin of the Jeep was festooned with wires.
The first step in cleaning up the mess was to purchase an inexpensive, generic, plastic, rectangular enclosure from Radio Shack. I drilled some holes to mount the connections for the Arduino/GPS unit. I put it together and tucked it behind the dash, nice and neat. So most of the wires were gone. The only remaining messy part was the display. I still had the bare display nestled e’er so gently in a knit cap that I’d leave on top of the dash as a pillow for my electronics. I wanted an enclosure that would fit snugly around the display, and that I could mount on the dashboard.
At some point along the way, I learned that the Washington DC public library system has a 3D printing service. For a minimal cost, they would make a print of an object. Fantastic! I just needed to figure out how to create a model. I learned that I was going to need to use a CAD program to create an .stl (STereoLithography) file, which seems to be one of the primary file formats in the 3D printing world.
Of course, I didn’t want to spend thousands of dollars on a CAD program that would take years to learn. Fortunately, there are free, easy-to-learn options, such as SketchUp or TinkerCAD. SketchUp is a native program that runs on Macs and Windows computers. While I have a couple of Macs, and I run various versions of Windows in virtual machines for testing purposes, at home, my primary computer is Linux. TinkerCAD is a very simple, web-based CAD program that works well in any modern browser.
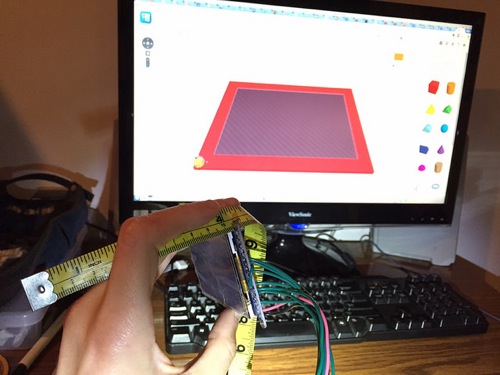
After a basic exploration of TinkerCAD, I was ready to go about designing the custom enclosure for my display. The display is a 2.8″ TFT LCD Touchscreen Breakout from Adafruit. I spent some time searching for specs that list the dimensions, but no such specs were to be found. So I pulled a tape measure out of my knitting kit, and built the CAD model as I measured the dimensions.
My first attempt included a back plane. Having no experience with 3D printing, I didn’t realize that in order to support the back plane during the printing process, the printer would have to lay down a grillwork of plastic that I would have to remove after the fact.
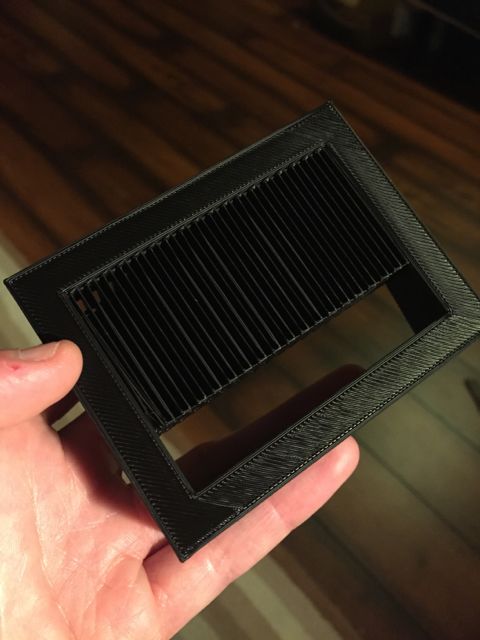
I attempted to remove the grillwork, but the plastic is surprisingly sturdy. (In fact, I was originally worried that the 2mm walls of my model would be flimsy, but it ended up being rock solid… Err, in a plastic sort of way.) So I removed the back in the CAD file, and resubmitted. I got back an enclosure that fits the display perfectly.

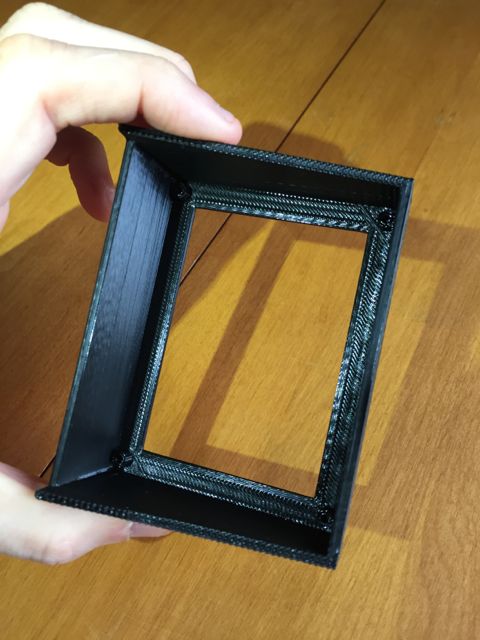
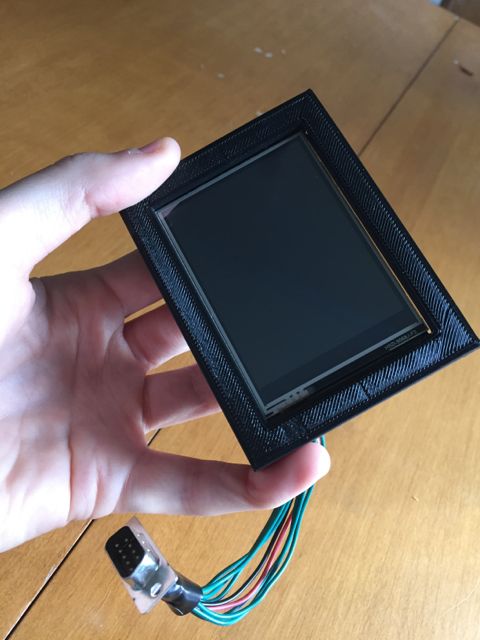
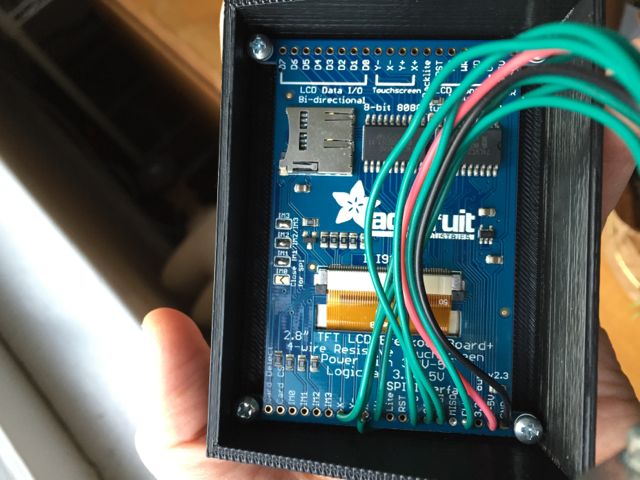
I considered adding grooves to the enclosure so I could print a separate back plane that could be attached and detached. In the end, I went with simplicity, and I just used a bit of Gorilla Tape for the back. I’ve mounted it on the dashboard (again, with Gorilla Tape until I settle on a more permanent solution), and it satisfies all of my greatest hopes and desires (with respect to a 3D printed enclosure anyway).